
Help Editor guide Cover and design
Designing your cover
Your cover is the first thing everyone sees. In the cover designer you pick a style, choose your colours and logo, and type the words for the front and the spine. Only the book's editors can change the cover.

Choosing a style
Click Pages in the main menu, then click the front cover at the top of the Pages screen. The cover designer opens on the Design tab, where the Style section shows every style you can use. There are a dozen ready-made styles. A leatherette cover offers only the styles that can be foil-stamped.
Choosing colours
Under Colours, pick a Cover colour and a Text colour. For a leatherette cover you pick a Leatherette colour and a Foil colour instead.
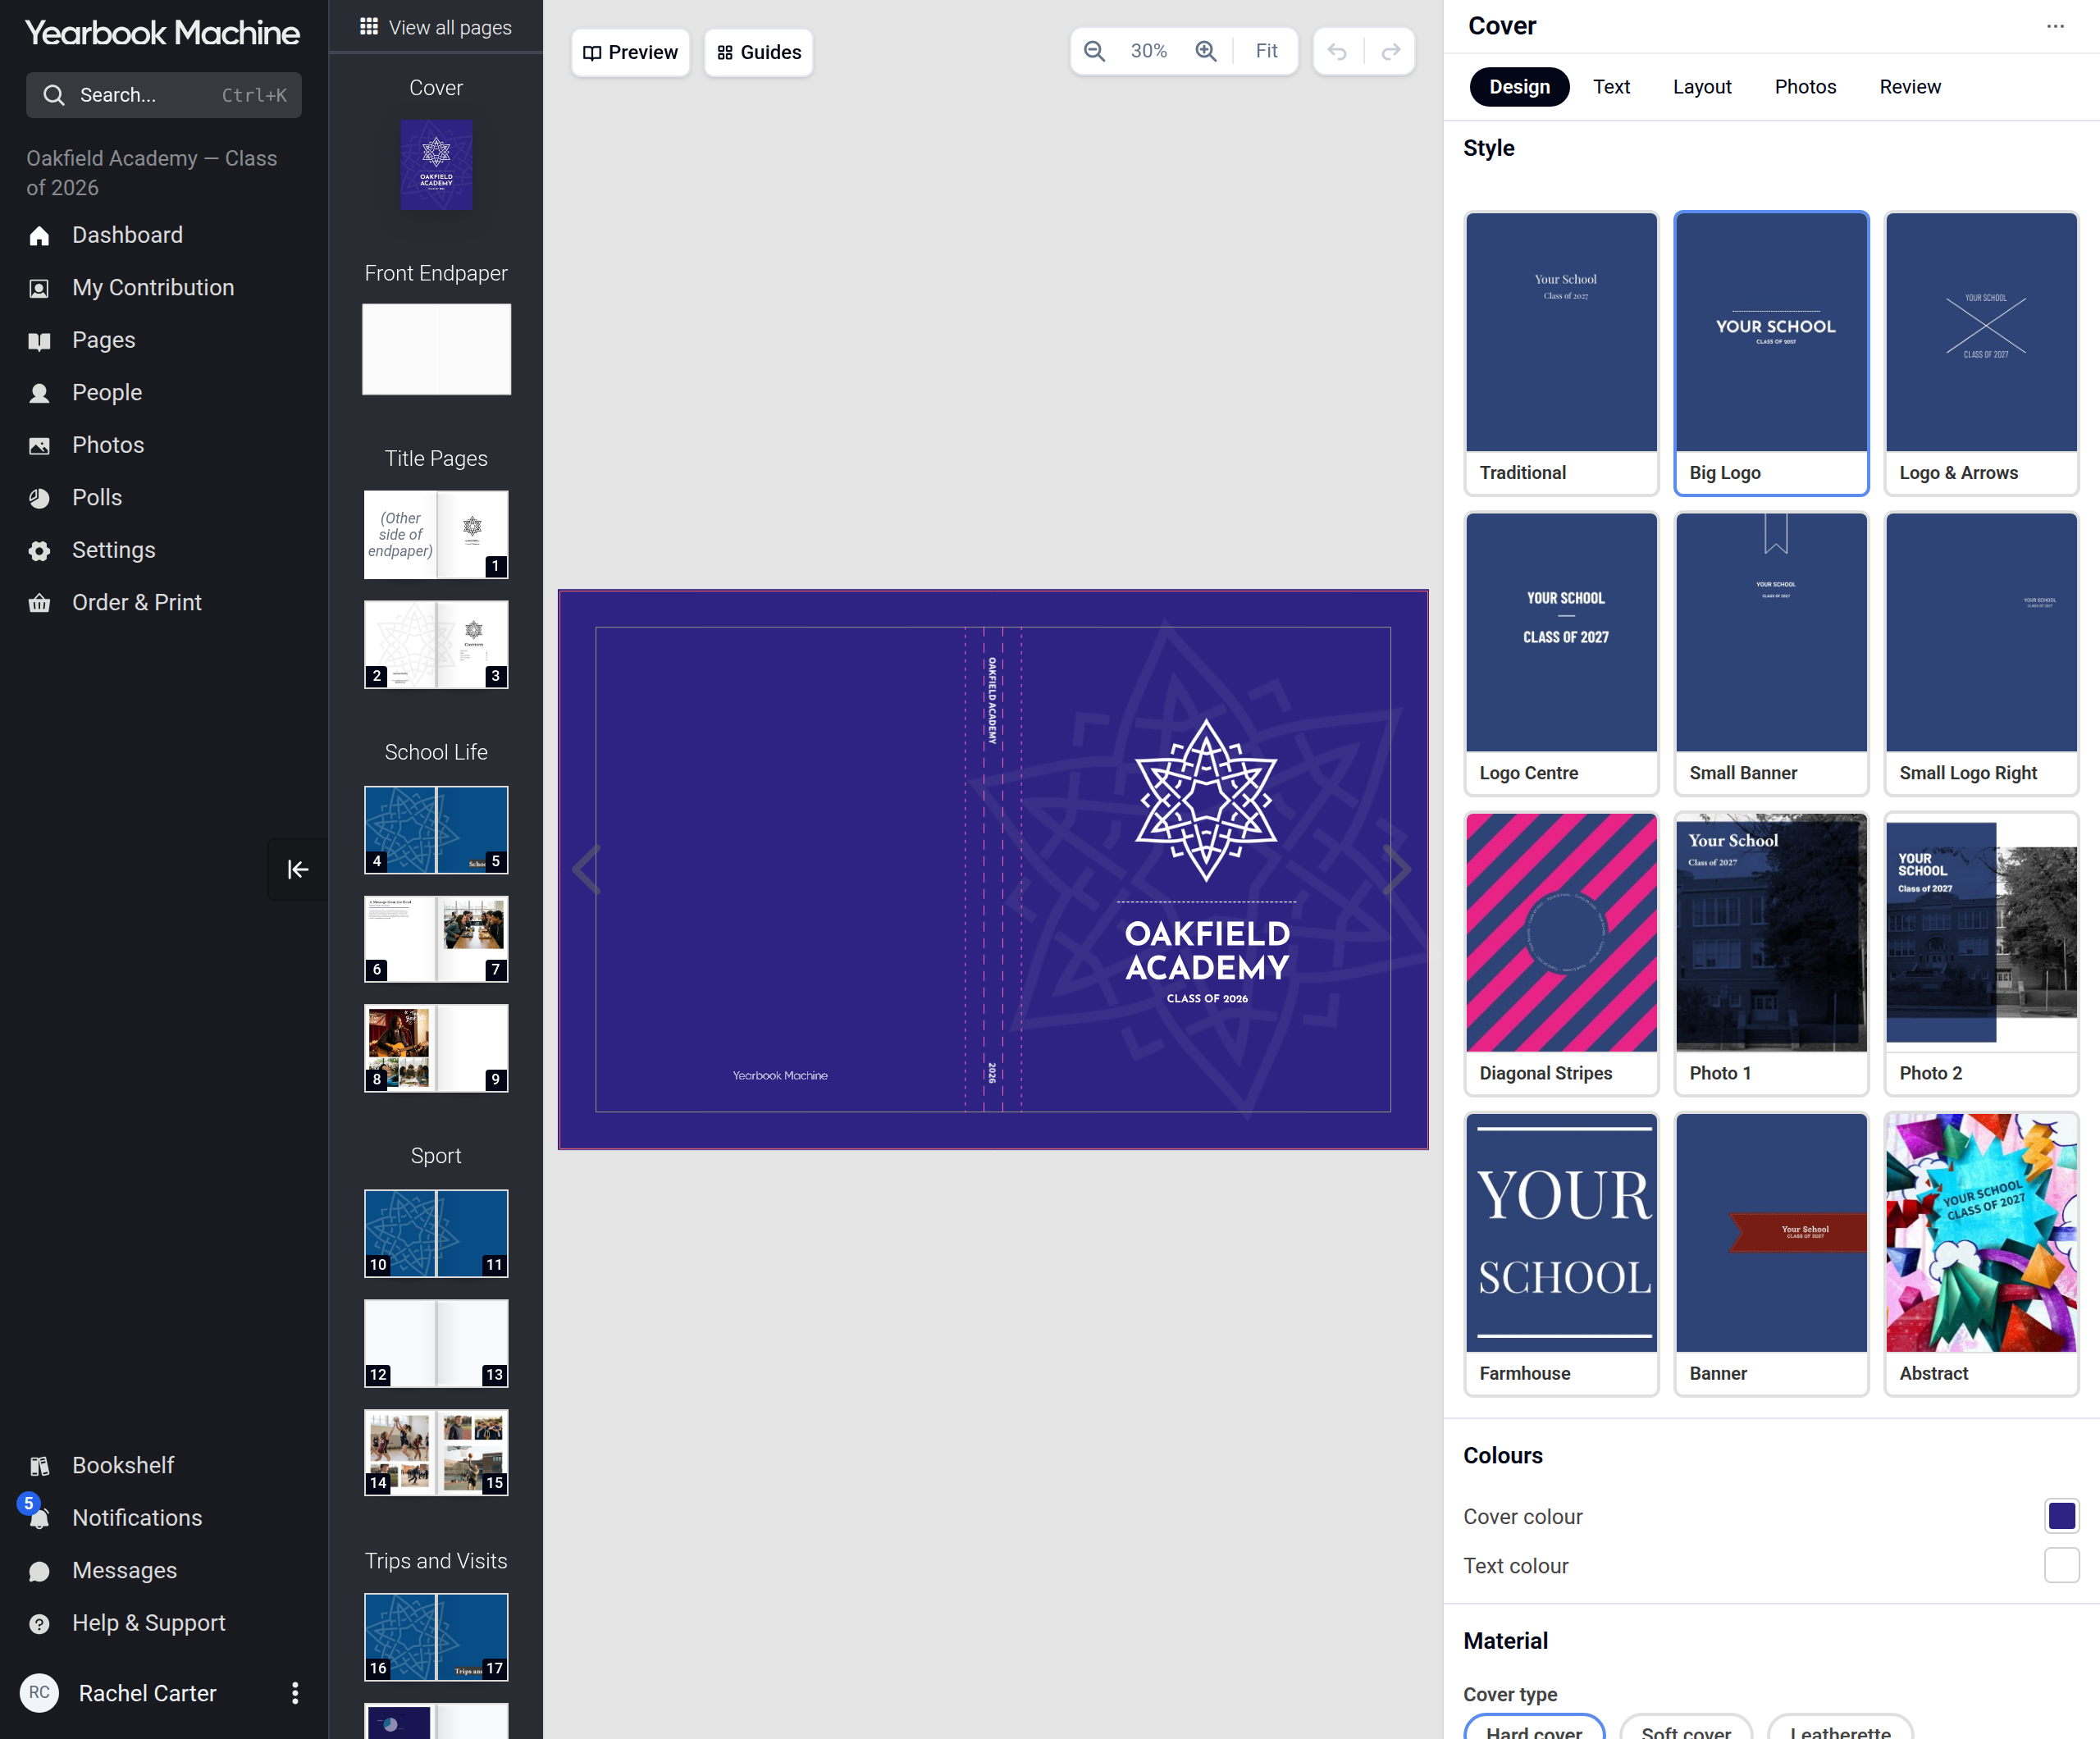
Pick your logo in the Logo section of the Design tab. See Adding your school logo.
Changing the cover type under Material can change your book's price and delivery date. If your book has a fixed specification, contact us to change the cover type.
Adding a border
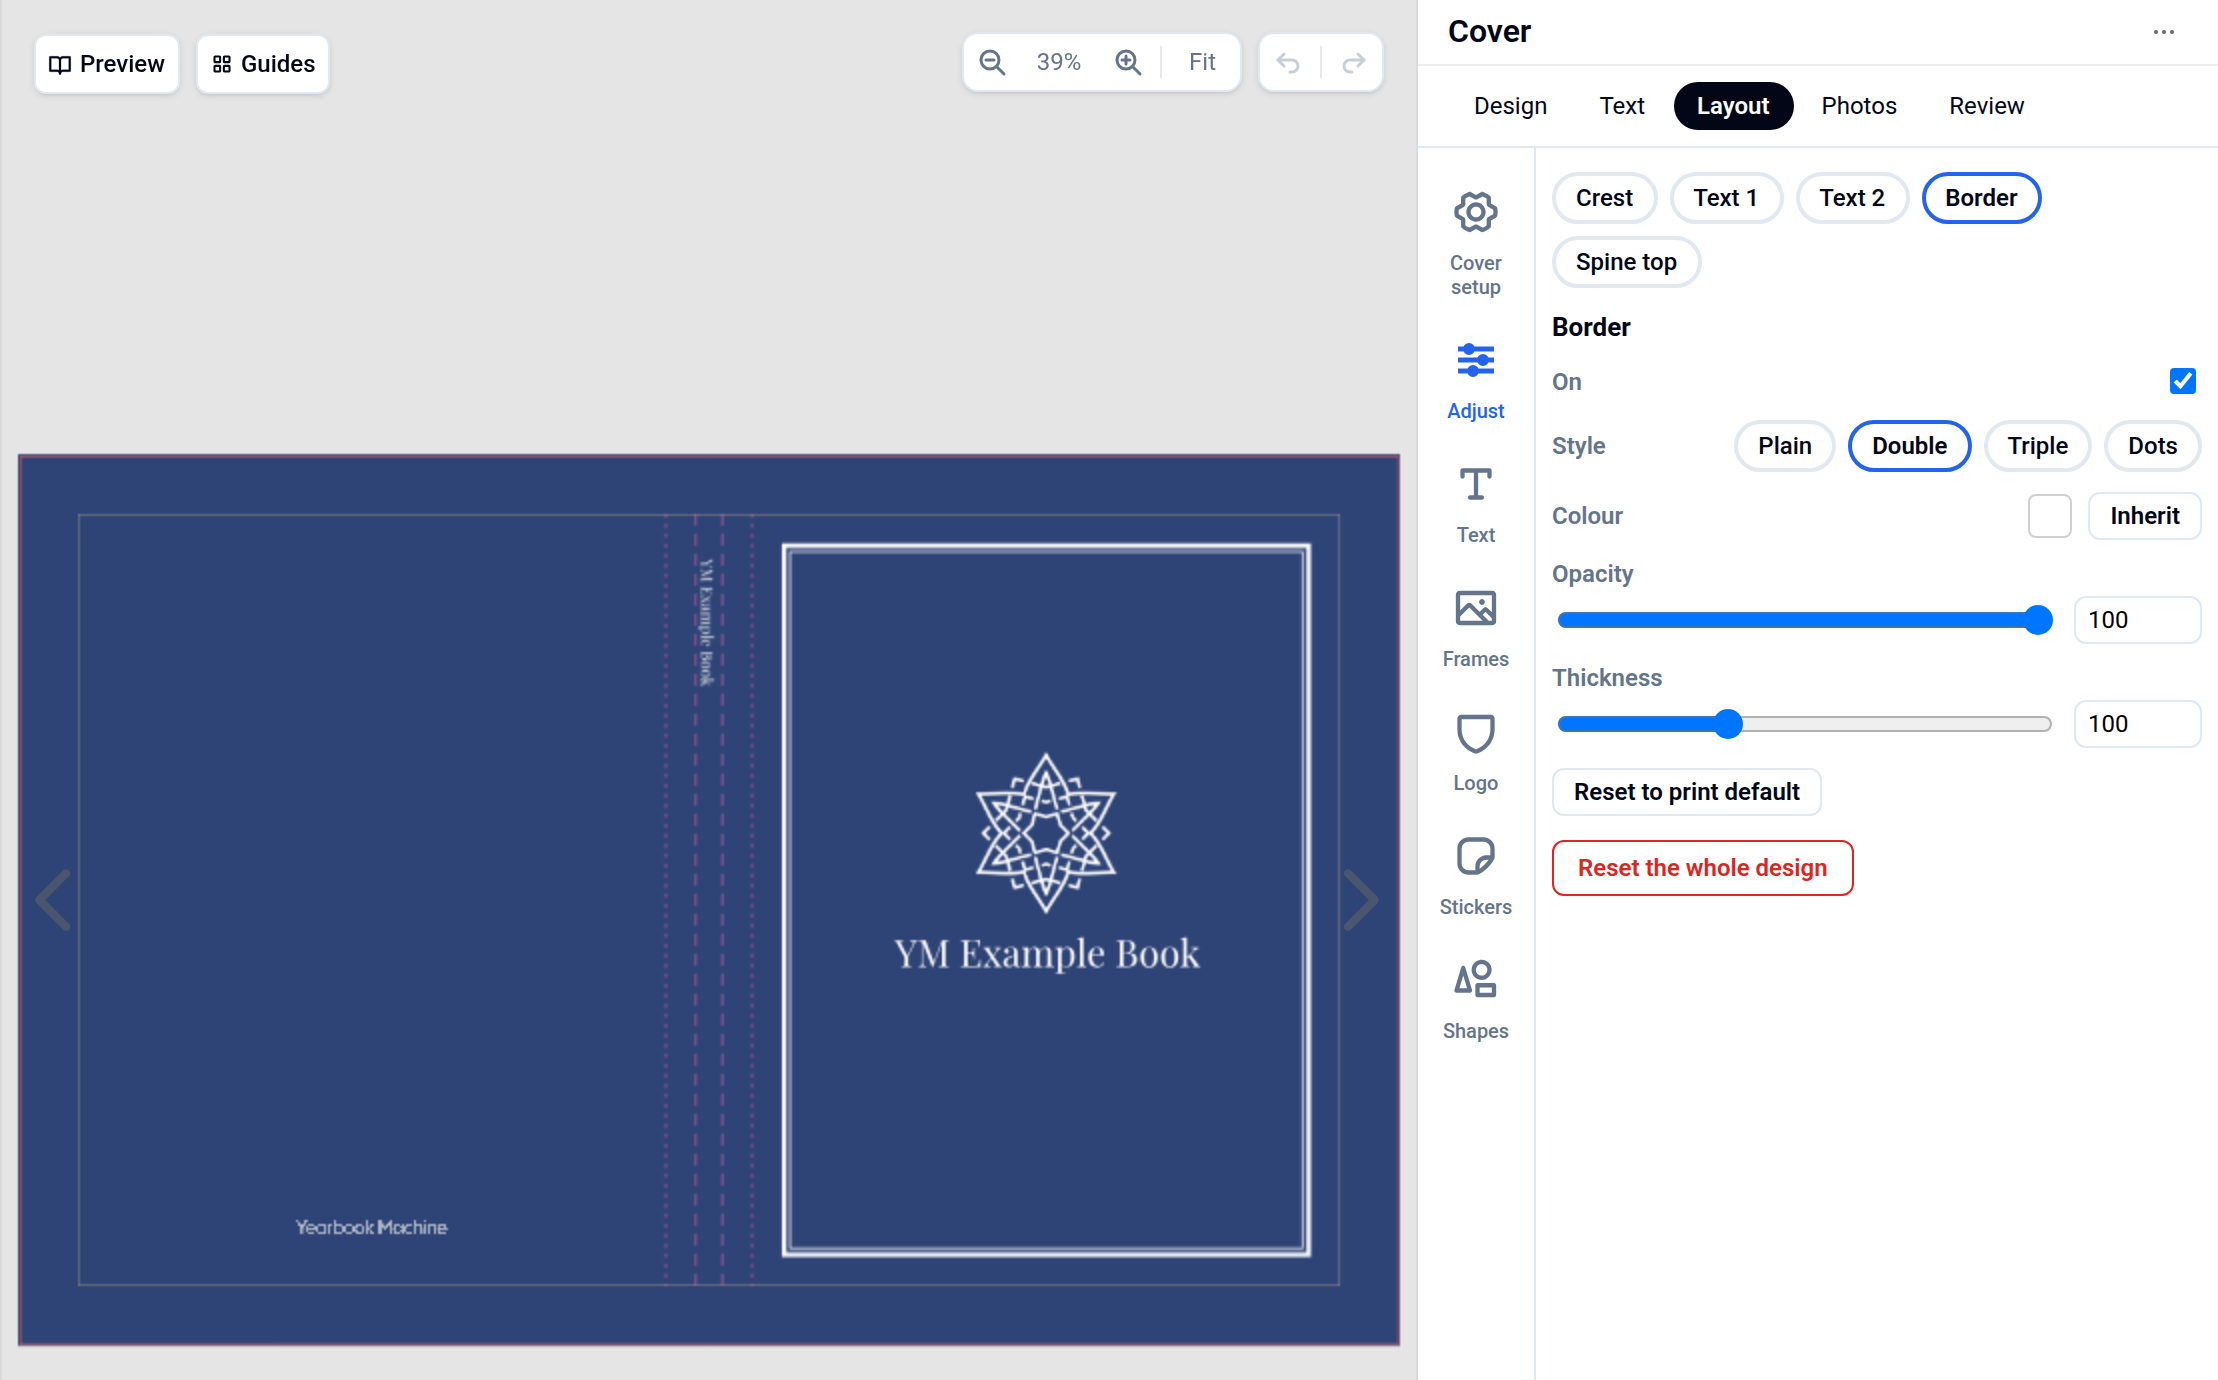
Some styles, such as Traditional and Logo Centre, have a border round the front cover. To change it, open the Layout tab, click Adjust, then click Border. Untick On to remove it, or choose a Style (Plain, Double, Triple or Dots) and set its Colour, Opacity and Thickness. Reset to print default puts the border back as the style had it.
Adding your words
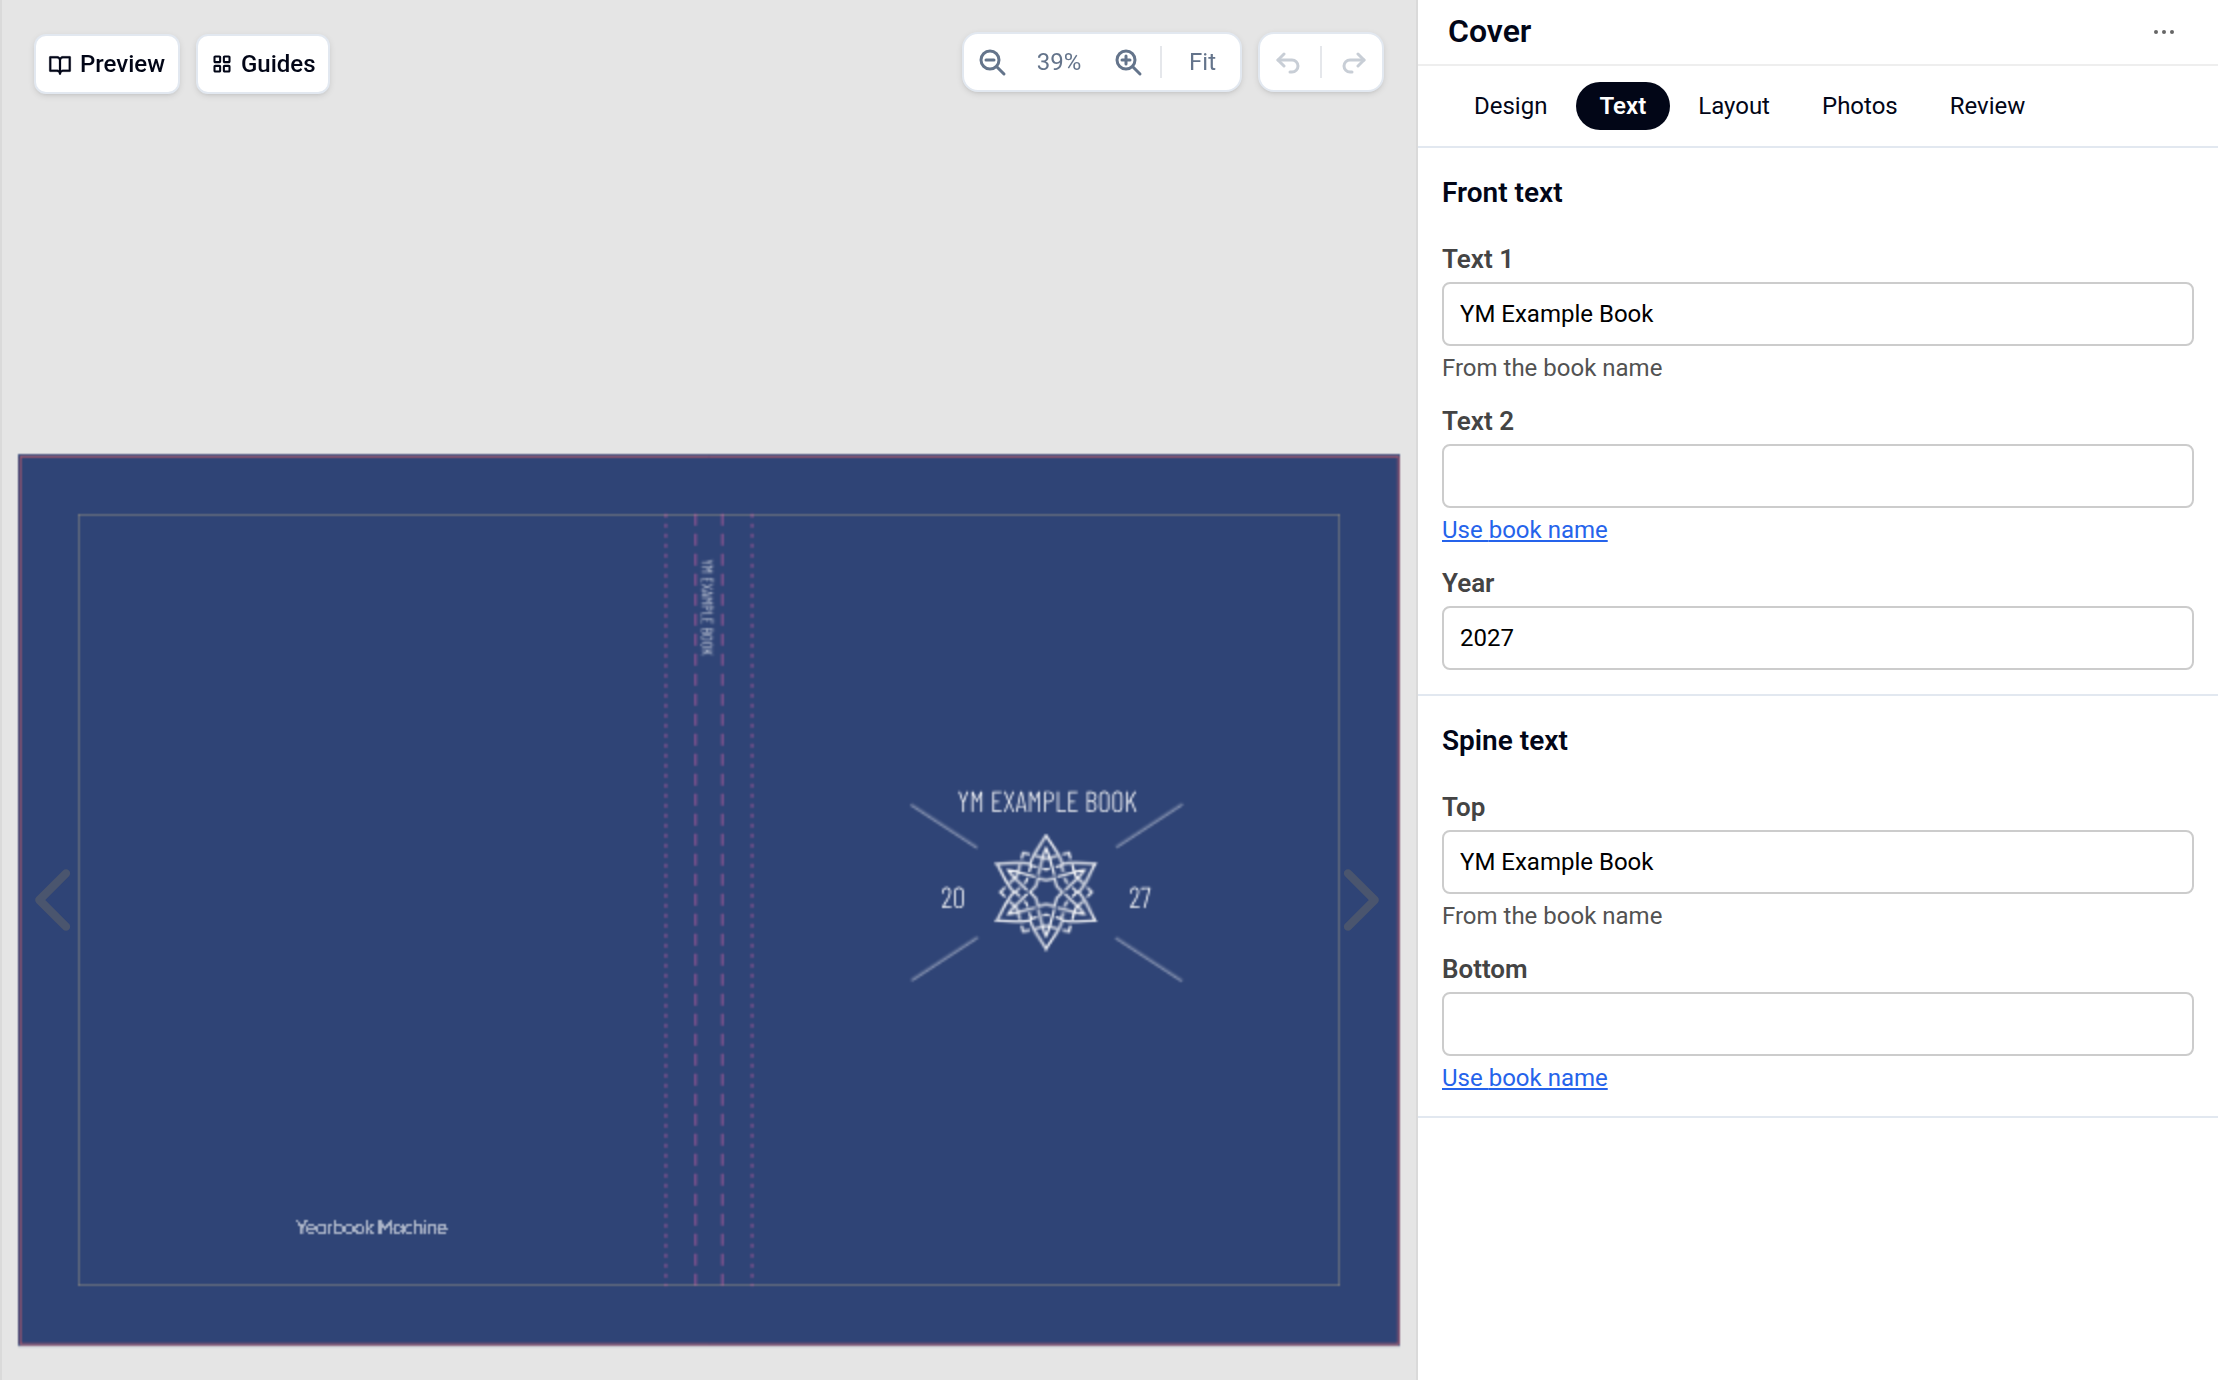
Open the Text tab. Type your title in Text 1 and Text 2 under Front text, and the words for the spine in Top and Bottom under Spine text.
The Logo & Arrows style also has a Year box. It shows the year split either side of your logo, for example 20 and 27. Type another year to change it.
Previewing your cover
Click Preview at the top left of the cover to see it as a 3D book. Click Stop preview to go back to editing.
Once you're happy, the cover preview updates everywhere your yearbook is shown, including the storefront.
Common questions
Can I use my own photo on the cover?
Yes. Choose the Photo 1 or Photo 2 style on the Design tab, then open the Photos tab and drag a photo from your library onto the photo frame on the cover.
What if I want a fully custom cover?
Open the Layout tab and switch Layout mode to Manual. You can then move and resize every part of the design, and add your own text, photos, stickers and shapes.
Where do I add our school logo?
In the Logo section of the Design tab. See Adding your school logo for uploading a new one.
Why can't I change my cover?
The cover has been marked as complete, so it is locked for everyone, editors included. The cover designer shows The cover is marked as complete, so it can't be changed. Changes to the whole book, such as its name, logo or colours, still reach a completed cover.
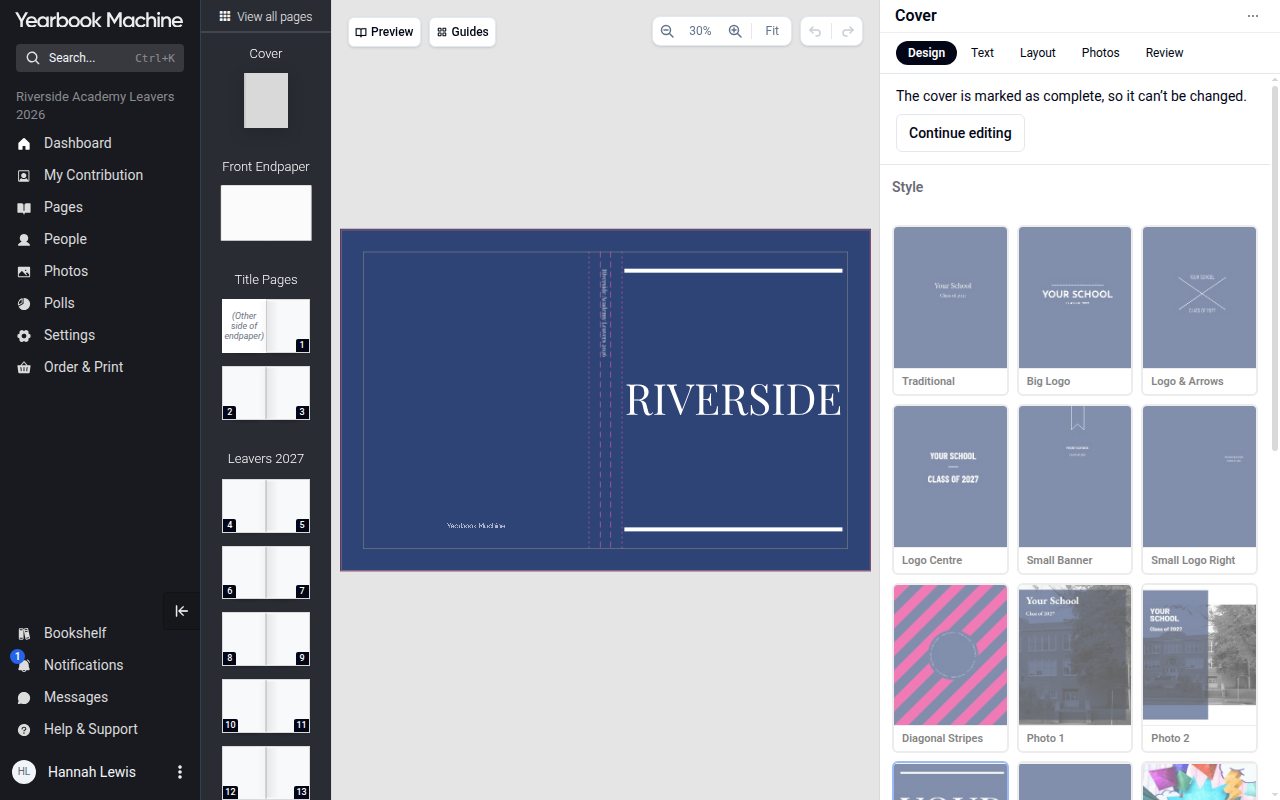
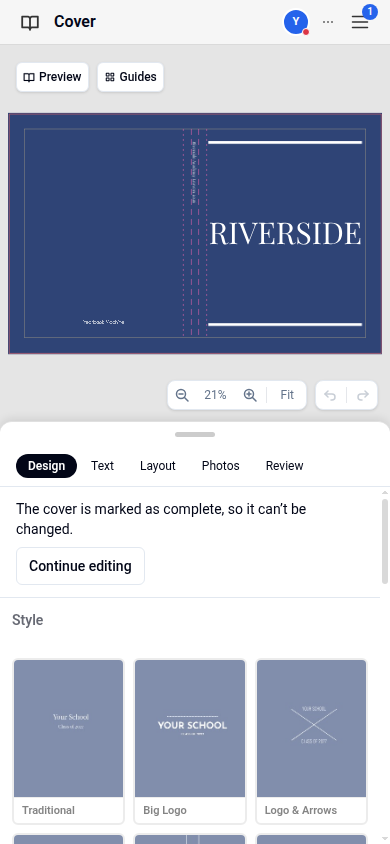
To change it, select Continue editing on that message, on the Review tab or in the cover's ⋯ menu. When you have finished, open the Review tab and select Mark as complete again. Until you do, your book's checks show the cover as not marked complete.
Was this article helpful?
Sorry, that didn't send. Please try again in a little while.
Thanks. That helps us improve this article.
Any other questions?
Email support@staging.yearbook.com and we'll help you out.